This will be our example image during the whole tutorial:

1. Colorize with layers
First we create at least two white layers on top of our greyscale layer and add a layermask to them. Into these layermasks we paste a copy of our greyscale layer. This will have the effect that only certain parts of the image will be colorized with a certain color. We have control over this by manipulating the layermasks. Now we need to set the layer mode of our white layers to "Multiply" and colorize both white layers with two different but still matching colors. this can be done via: "Colors" -> "Colorize" and now you need to lower the lightness below zero since we want to colorize a white layer. By now you should have something like the following:
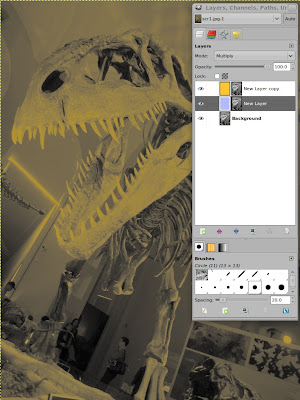
But both color layers apply to the same region of the image. You can change that by simply inverting one of the layermasks. So one layer will colorize the shadow parts and the other one the brighter parts. But the mids are still affected by both layers. We can avoid that by applying the following curves tool to both layer masks:
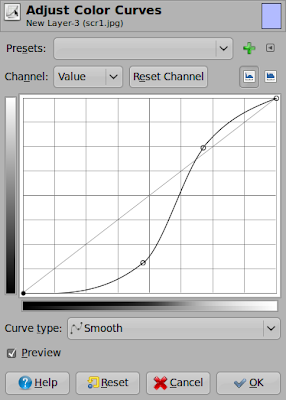
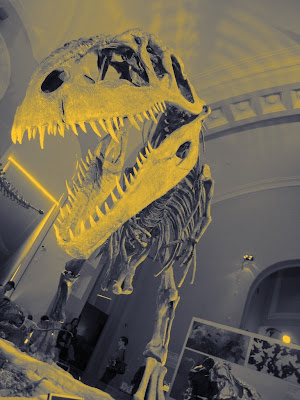
This will seperate the layers' areas of effect from each other and increasing the color contrast a bit more. this is the basic setup. Now you can start to fine tune both layers colors via "Colors" -> "Hue-Saturation". You can also try different layer modes or add some more colors by adding more color layers. Moreover you can tweak the layermasks to your needs. What I really like about this method is, that it is completely non destructive except the modifications you apply to the layer masks. You simply revert to the original by deleting the layers or making them invisible and you can tweak and change every step afterwards. This is my result with no more additional tweaks:
2. Curves Tool
As you might know you can use the curves tool to edit the RGB channels seperately. And as soon as one of the three channel contains at a certain location a different value than the other two it gets colored. So if you apply different curves to the channels you can achieve a colored image. This might read more complicated than it actually is. Let's start with a new image and duplicate the "Background" layer since this method is somehow pretty destructive and you will need a lot of testing and fiddling around. What comes in handy is that Gimp now keeps track of which settings you used with the curves tool and you can reselect them based on the time you applied them. You can also store them permanentely in the curves dialog. There is just one simple step: "Colors" -> "Curves" and then select the appropriate Channel with the dropdown menu and go for it.
This method is not very complicated to follow technically hence I will just show some results with the curves settings I used:
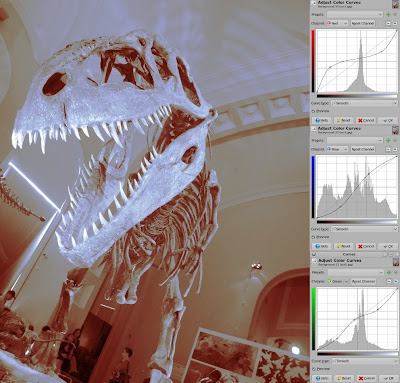
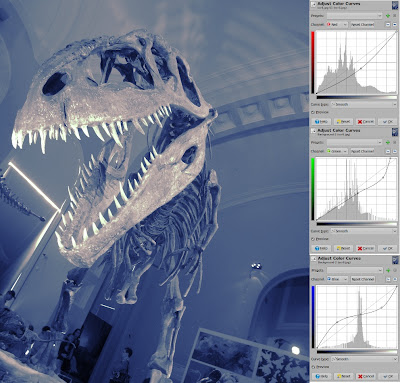
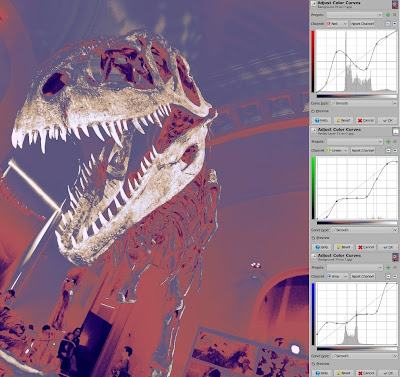
Especially the last pic shows that it's rather easy to even include several colors with one step but it's hard to keep control over the three channels. It would be easier if one could see all five curves for the channels at once while editing them. Both methods explained need a bit of experience until they do what you intend but this applies to many stuff so keep testing!

0 Comments:
Post a Comment