
Therefore we need any clipart to apply the effect to like the following Firefox icon:

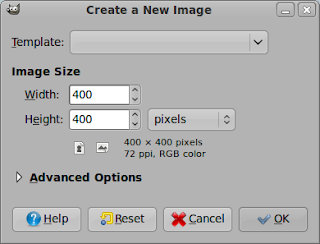
Now let's get started and create a new image in Gimp with the following properties:
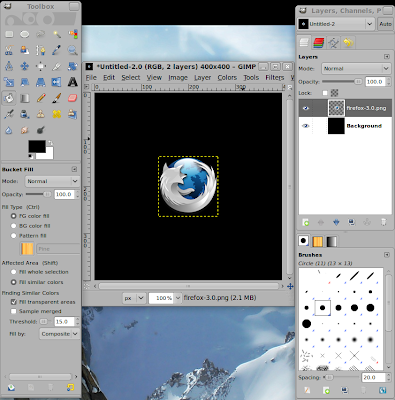
Now fill the background layer with pure black and open the icon or whatever you want as a new layer via "Ctrl + Alt + O":
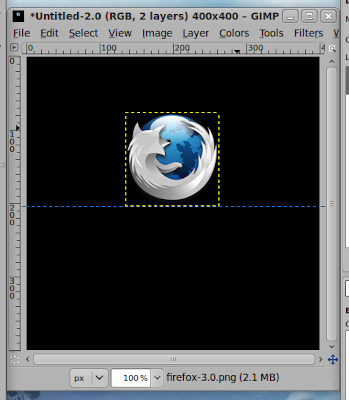
Now create a guide by clicking on the top ruler and dragging the mouse about into the center of the picture. Align the bottom edge of the icon-layer on this guide with the Move-Tool that can be accessed via pressing "m":
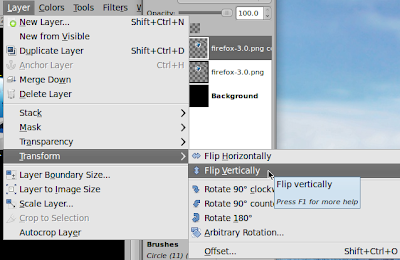
Now we need to duplicate the layer by using the shortcut "Shift + Ctrl + D", flipping the layer vertically and aligning its top edge on our created guide. Be careful not to move the duplicated layer to the left or the right because then the reflection will not look realistic:

Select the flipped layer and apply the Gaussian Blur Filter: "Filters" -> "Blur" -> "Gaussian Blur" with the radius of 15px:

We are almost done. We need to add a layer mask to the flipped to let the reflection fade out to the bottom. Therefore we add a white layer mask as follows:
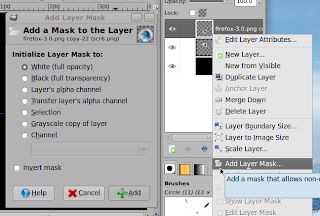
Layer masks are very useful. They contain a greyscale image where the brightnes of every pixel indicates the visibility of the pixel in the actual layer. So you can edit the transparency of a layer without touching the layer. Instead you can easily revert any changes to the layers transparency by editing the mask. Keep that in mind when you want to make something transparent. We will come back to this method in later tutorials.
The next step is to select the layer mask and add a vertical black to white gradient. To do this make sure that your two selected colors are black and white and select the gradient tool via "l". Now click at the very bottom of the blured layer and drag down to the top edge and make sure that the line you drag is exactly straight. Release the mouse and you will see the layer fade in one direction. If it is the wrong you will have to invert the colors of the layermask by clicking the following: "Colors" -> "Invert". Make shure that you still have the layer mask selected. If you want to change the hardness and position of the fade just use the following tool when having selected the layermask: "Colors" -> "Curves". Play around with this tool and you soon will find out what it does.
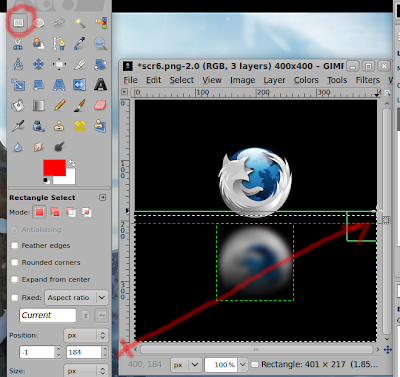
Last step is to apply a gradient to the background layer to simulate a slightly illuminated floor. Therefore we select a bit more than the half of the image starting at the bottom with the rectangular selection tool and then fill it with a gradient with a lowered opacity. Make sure that you have the background-layer selected and that the gradient again is perfectly vertical:
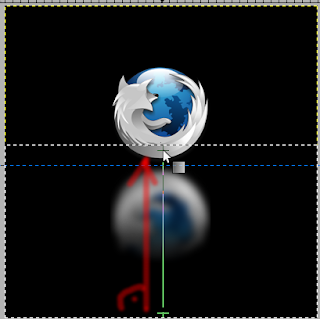
We are finished. Again you can use the Curves tool to modify the floor to your needs. The final result might look like this:

0 Comments:
Post a Comment