Showing posts with label techniques. Show all posts

Retouching a portrait - Part 3: Eyes and final touch

The second part of this series can be found here.
This time we will be fokusing on the eyes. On a portrait they are always the eyecatcher hence we should deal carefully with them and try to get the best out of them. Since we already created the appropriate layers we just have got to apply some filters color corrections and set the proper layer mode. At the end we will be applying some extra sharpening to the edges and add some general color adjustments.
This is what we got for now:
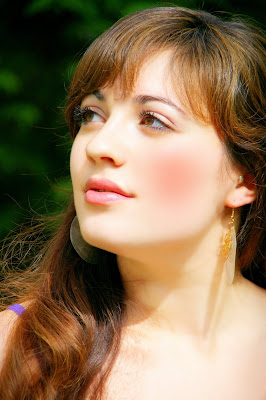
Set the layer mode of "Eyes #1" and "Eyes #2" to screen and you will see that the eyes will get brightened as hell. It is a bit to much but first we want to sharpen the eyes a bit. To do that we make a selection around the eyes so that we dont have got to wait that long for the filters to be applied:
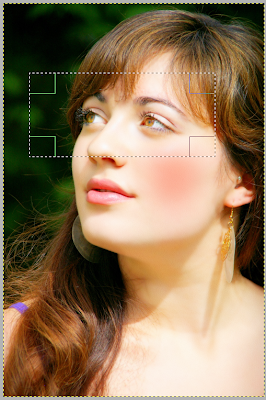
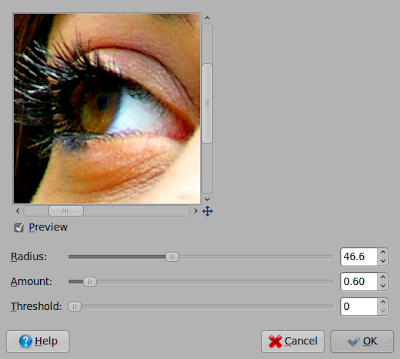
Now we apply th following filter to "Eyes #1": "Filters" -> "Enhance" -> "Unsharp Mask" with the following settings:
Select the other eyes-layer and apply this "Unsharp Mask":
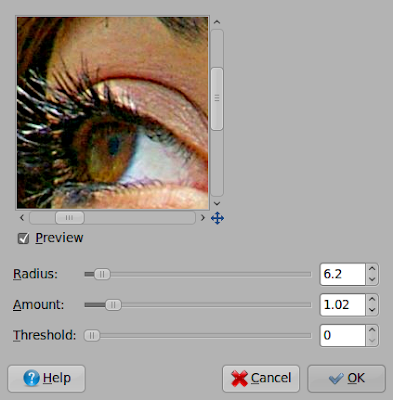
You can leave the opacity of the "Eyes #1" layer as it is and decrease the other eye layer's to about 50%-60%. It is a matter of taste and you should try it out on your own. So we are finished with the eyes. Again: this is the very basic stuff you can do. There are A LOT of further possibilities to tweak a face even further! Maybe I will pick up some special aspects in later articles.
This is what we got so far:
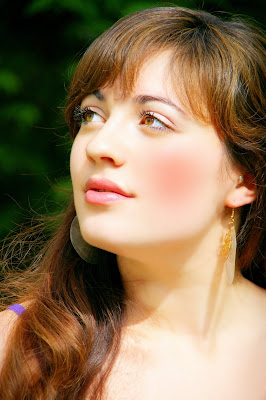
Now we right click on the top layer and select "New from visible". Now clear our selection and duplicate this new layer and invert its colors. Apply to both layers the following filter "Filters" -> "Edge-Detect" -> "Neon":
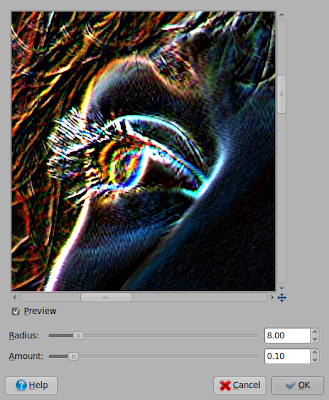
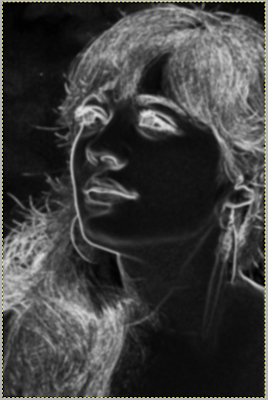
Now set the top layer's mode to "Addition" and again rightclick on the top layer and select "New from Visible" and then delete the two layers we used to create the third one. Desaturate this new layer (lightness) and blur it with the Gaussian Blur Filter with radius of 25px. What we have now should look like something like this:
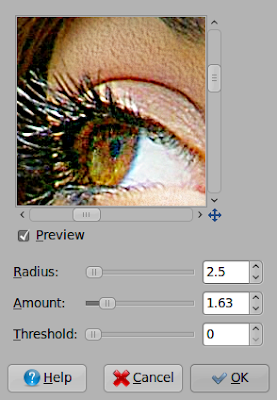
Make this layer invisible and again create a new layer from visible. We now want to sharpen this layer and apply our blured layer that is invisible as layer mask. First we use the Unsharp Mask as follows:
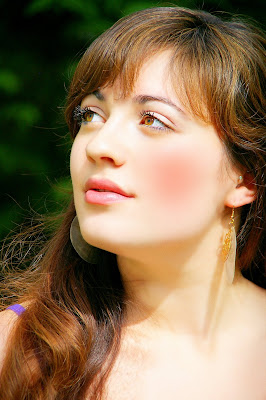
Now add a layer mask to this layer and copy the b-w layer that contains the edges into the layermask via first right klicking onto the sharpened layer and selecting "Add Layer Mask" and clicking add second selecting our blurred edge layer and pressing "Ctrl" + "A", "Ctrl" + "C" selecting the layermask and pressing "Ctrl" + "V" third rightclicking onto the floating selection and choosing "Anchor Layer". You can adjust the amount of sharpening with the opacity of the layer that contains the sharpened image. If you want you can now create another layer that contains the whole image and apply some color corrections. But I am rather satisfied with my example image. So I will skip this step.
For now we are finished with our little workthrough in photo retouching. I will be covering some special parts in later tutorials. So stay tuned!
Colorizing a greyscale image

Some people tend to apply a greyscale filter to their pics while taking the photos. So they don't even have got a colored version of their shot. Sometimes this is a pitty since you can always convert it to greyscale on the PC afterwards with nearly every simple imageviewer. So first I would recommend that you always shoot just in color mode and convert it afterwards to greyscale. But now we want to discuss some methods to colorize a greyscale image. But don't expect to much since we have got to add all color manually and it won't be looking realistic at all.

This will be our example image during the whole tutorial:

1. Colorize with layers
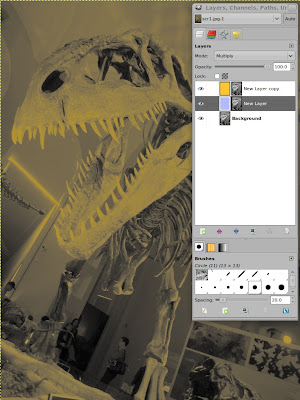
First we create at least two white layers on top of our greyscale layer and add a layermask to them. Into these layermasks we paste a copy of our greyscale layer. This will have the effect that only certain parts of the image will be colorized with a certain color. We have control over this by manipulating the layermasks. Now we need to set the layer mode of our white layers to "Multiply" and colorize both white layers with two different but still matching colors. this can be done via: "Colors" -> "Colorize" and now you need to lower the lightness below zero since we want to colorize a white layer. By now you should have something like the following:

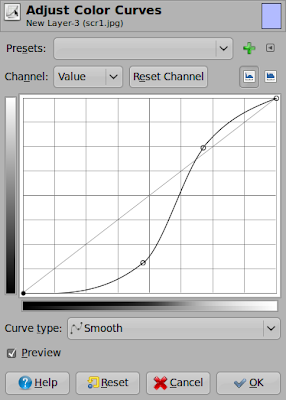
But both color layers apply to the same region of the image. You can change that by simply inverting one of the layermasks. So one layer will colorize the shadow parts and the other one the brighter parts. But the mids are still affected by both layers. We can avoid that by applying the following curves tool to both layer masks:

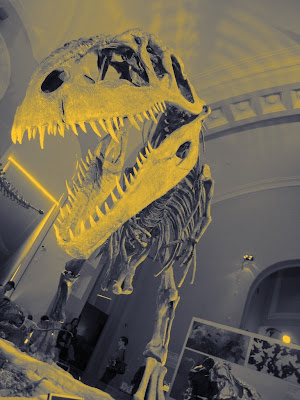
This will seperate the layers' areas of effect from each other and increasing the color contrast a bit more. this is the basic setup. Now you can start to fine tune both layers colors via "Colors" -> "Hue-Saturation". You can also try different layer modes or add some more colors by adding more color layers. Moreover you can tweak the layermasks to your needs. What I really like about this method is, that it is completely non destructive except the modifications you apply to the layer masks. You simply revert to the original by deleting the layers or making them invisible and you can tweak and change every step afterwards. This is my result with no more additional tweaks:

2. Curves Tool
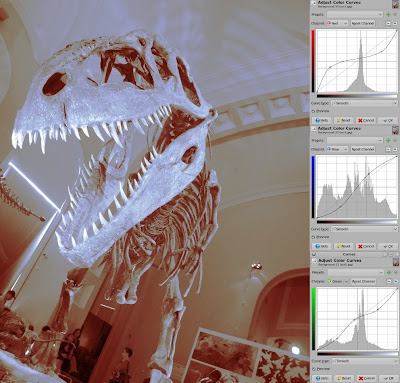
As you might know you can use the curves tool to edit the RGB channels seperately. And as soon as one of the three channel contains at a certain location a different value than the other two it gets colored. So if you apply different curves to the channels you can achieve a colored image. This might read more complicated than it actually is. Let's start with a new image and duplicate the "Background" layer since this method is somehow pretty destructive and you will need a lot of testing and fiddling around. What comes in handy is that Gimp now keeps track of which settings you used with the curves tool and you can reselect them based on the time you applied them. You can also store them permanentely in the curves dialog. There is just one simple step: "Colors" -> "Curves" and then select the appropriate Channel with the dropdown menu and go for it.
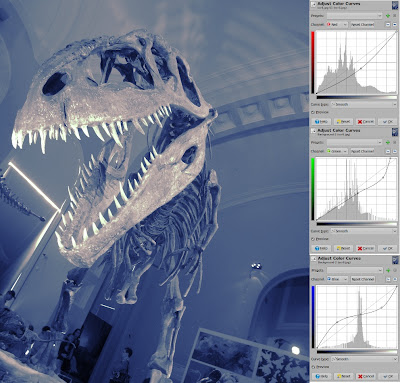
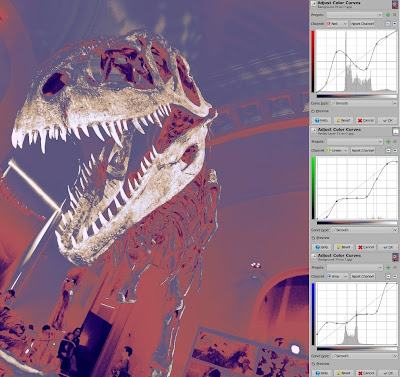
This method is not very complicated to follow technically hence I will just show some results with the curves settings I used:


Especially the last pic shows that it's rather easy to even include several colors with one step but it's hard to keep control over the three channels. It would be easier if one could see all five curves for the channels at once while editing them. Both methods explained need a bit of experience until they do what you intend but this applies to many stuff so keep testing!

Retouching a portrait - Part 2: Skin

The first part of this series can be found here.

The most important part of a portrait is the skin. Our next goal is to achieve a very smooth and perfect look that still does not look articial. Therefore we need the two skin layers with those fancy masks we created in the first part.

We created two different layers for the skin to vary the intesity of the bluring we are going to apply now. Select the "Skin #1" layer and apply a gaussian blur with 15px radius. Select the "Skin #2" layer and apply the gaussian blur with about 25px radius. You might find that especially the left edge of the nose is a bit to blurry so select both layer masks and paint them on this line black with a fuzzy brush. The sharp edge should reemerge. Do so for any other area you might find being blurred to much or being unneccessarily blurred at all. Afterwards you might have a result similiar to this:


As you can see there are some light spots that are a bit distracting. We can get rid of them by applying the curves tool to the "Skin #2" layer with the following settings:


This step makes the skin a bit paler but that should be okay since lighter skin looks a bit cleaner. But it is a matter of taste. You can also leave out the last step if you don't like the result. Next step will be to add a little color to the cheeks. To do that create a quick selection:


Go to "Select" -> "Toggle Quick Mask" or simply hit Shift + Q. We are going to blur the selection very much. I would recommend about 250px with the gaussian blur filter. The selection might have gotten a bit to small. But we can increase its size with the curves tool and the following setting:


Now we blur again with the gaussian blur with about 150px radius. Hit Shift + Q again, create a new transparent layer, rename it to "cheeks", place it at the top of our layer stack and select the "Color Picker Tool". Now select the "Skin #2" layer and pick a color that lies in our selection and modify it as follows:


Select the "cheeks" layer again and fill the selection with the "Bucket Fill Tool". You might realize that this is far from being optimal. You can use the following "tools" to improve the result:
-change the opacity of the layer
-play around with "Color" -> "Hue-Saturation"
-play around with "Color" -> "Curves" while modifying the alpha channel
This is what I can come up with:


I just lowered the opacity to 65% and boosted the saturation a bit. Now we need to apply some structure to the skin. Therefore we need to duplicate our "Skin #1" layer, move it on top of our stack and fill the whole layer with plain white. Then we blur the layermask a bit let's say with about 40px radius. Now select the layer and apply a noise via: "Filters" -> "Noise" -> "HSV Noise" with these settings:


Now your image should look something like this:


We should duplicate the "Skin #3" layer. Now apply the gaussian blur to the "Skin #4" layer with about 2px radius. Now we need to apply the Embos filter to this new layer which can be found at "Filters" -> "Distorts" -> "Emboss..." with the following settings:


Since the image looks rather messed up by now we need to change the layer modes and opacities of the two new layers. I put the two setting together in one screenshot:


That's about it for now. You can see that there are still many rough edges all over the pic which just can be removed with a lot of manual work and fiddling around which I just left out for times and spaces sake. To be continued...
The third part of this series can be found here.

Desaturating properly

This guide will explain how to achieve a good grayscale version of a colored image. Since the normal "Desaturation" option that can be found in Gimp via "Colors" -> "Desaturate" isn't that sophisticated and customizeable we will be using the Channel-Mixer instead. This one can be found at "Colors" -> "Components" -> "Channel Mixer". But first things first.
We need a image that we want to desaturate. I will first go into detail with the first image to state an example and show some further results with other pictures. So open up an image like this one for example:


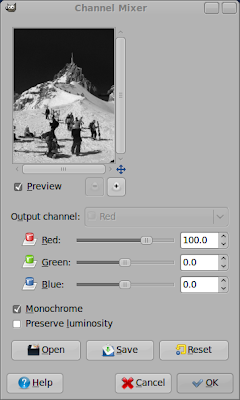
Now go to "Colors" -> "Components" -> "Channel Mixer" and check the box that says "Monochrome".
(It might come handy if you also activate "Preserve luminosity" to avoid over exposed spots in the pic)


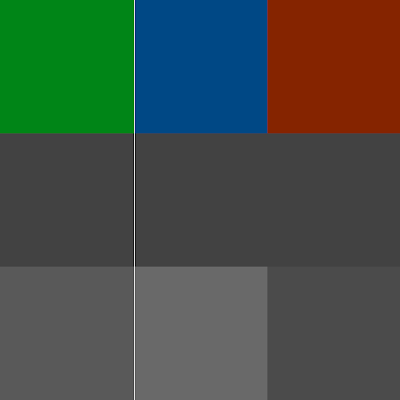
Now you can convert the three color channels into greyscale an the values will be added which will be representing the brightness of a pixel. The cool thing is that the Channel-Mixer also accepts negative values for the channels which will result in a substraction of brightness. What is important while looking for the right settings is that different colors in the pic will be represented by different grey-values to maintain the difference in color in the desaturated image. Let me show you an easy example what I mean:


The three different colors are made to the exact same grey since in the HSV color profile they have got the same V-Value which stands for the brightness and this value is simply taken for they greyscale which let's one asume that it also has been the same colour as before.
I fiddled a bit around with the channelmixer and this is what I can come up with concerning my example picture:


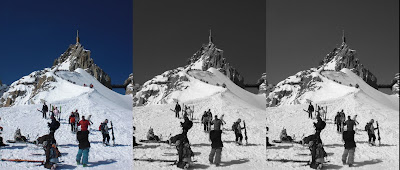
(Original, Desaturate, Channel-Mixer - from left)

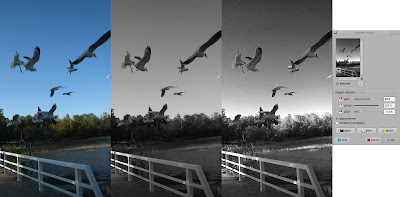
As you can see the difference in this pic isn't _that_ huge but let's check out what we can do with the following pics:


(Original, Desaturate, Channel-Mixer - from left)

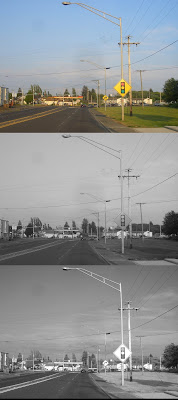
(Original, Desaturate, Channel-Mixer - from top)

Especially the last example shows the advantages in some cases. The conventionally desaturated image does barely show the clouds. But the image achieved with the Channel-Mixer preserves a certain contrast in the important parts of the image (i.e. sky). But still it massively depends on your source image which method results in better greyscales. You need to find it out via trial and error and much experience.