We are going to start with the following pic as an example:

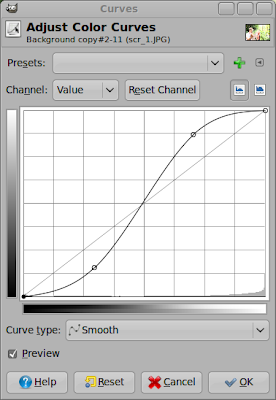
First we create two duplicates of the layer and select the top one that is visible. Now we apply the following color manipulation: "Colors" - "Curves" and something like this:

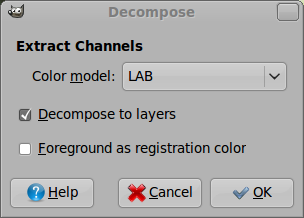
Make the layer invisible and select another layer and do the following: "Colors" -> "Components" -> "Decompose" and choose these settings:

The created image contains three layers "L", "A" and "B". The important layer for us is the "L" layer. Select it and apple the same curves tool settings to this channel as you have done before. You can choose the last settings from a dropdown menu in the curves tool dialoge. Now let's recompose the image via: "Colors" -> "Components" -> "Recompose". Now you can close the LAB image without saving and return to the original one and see the result of our work in the LAB color space:

(After curves tool in RGB color space)

(After curves tool in LAB color space)
As you can see there is a huge difference in the results that we achieved. Both versions are somehow way to extreme but you can clearly see what the difference is. I recommend you to repeat this experiment with some more pics to get a clue what you can expect from this way of working with the images. As usual the best way to get to a certain impression on the image varies a lot with variing pics. I will soon be writing some more really useful stuff on how to efficiently using the LAB color space. So stay tuned!
0 Comments:
Post a Comment